Buttons in dashboards
You can add dashboard buttons that launch record operations or link to URL's from directly within a widget, making your dashboards more interactive to improve user experience.
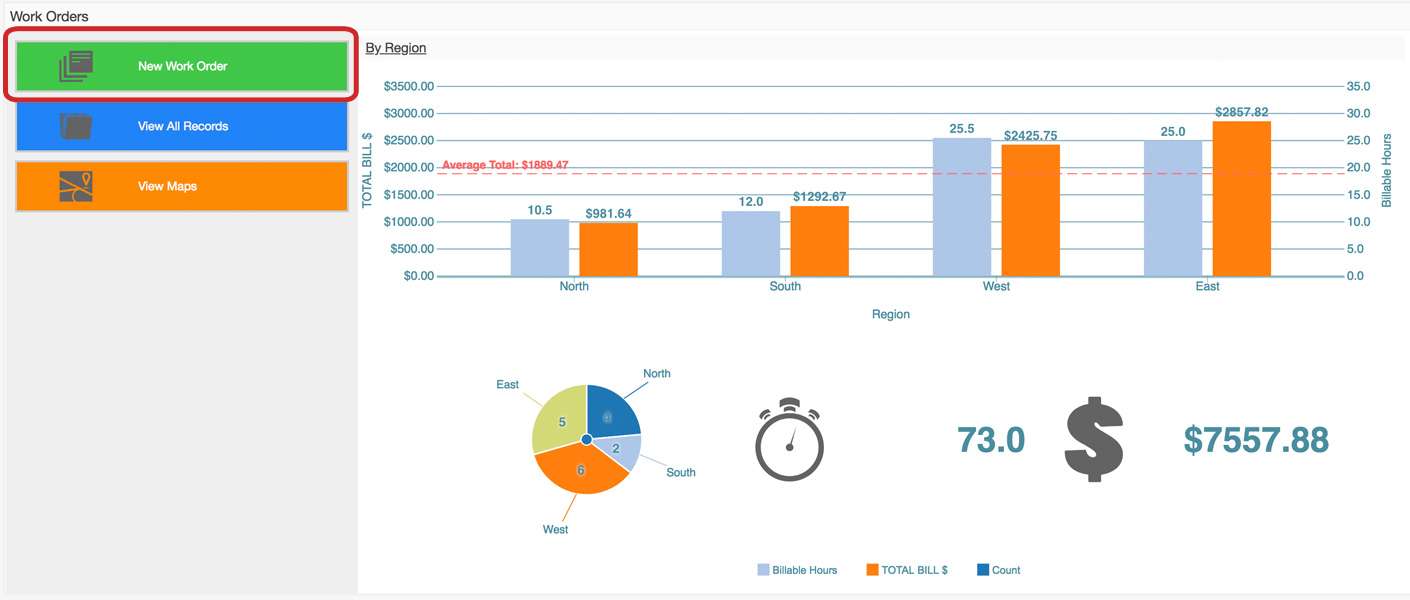
➤ You can see it in action here.
Example
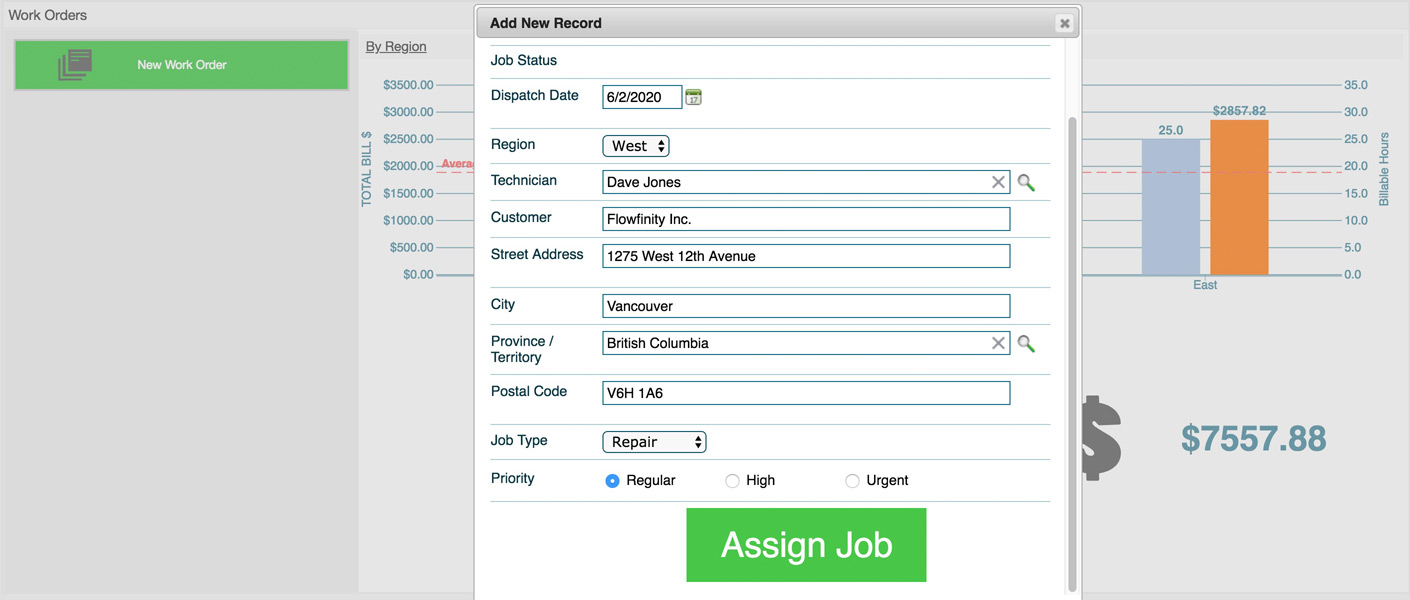
A manager views a dashboard to monitor regional dispatch details and profitability in real-time. The dashboard has a button that instantly creates and assigns a new work order, without having to navigate away.
Instructions
- Find the dashboard you would like to edit (e.g. Work Orders).
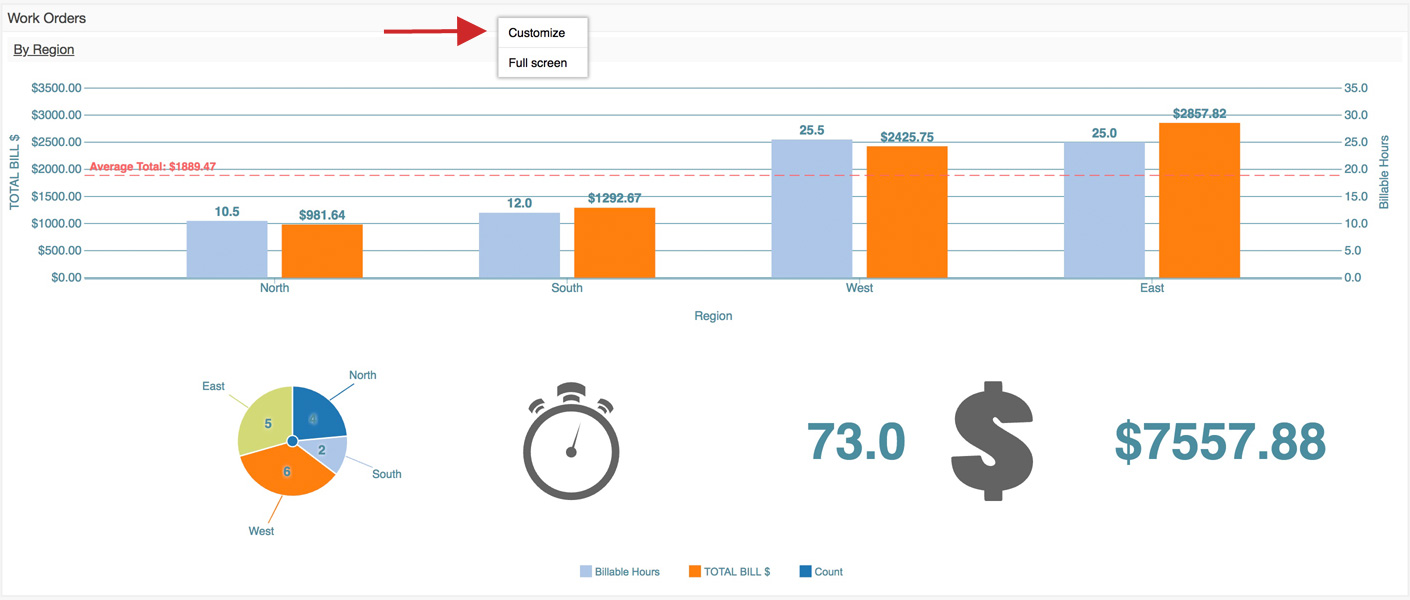
- Right-click on the dashboard, and select 'Customize' from the pop-up menu.
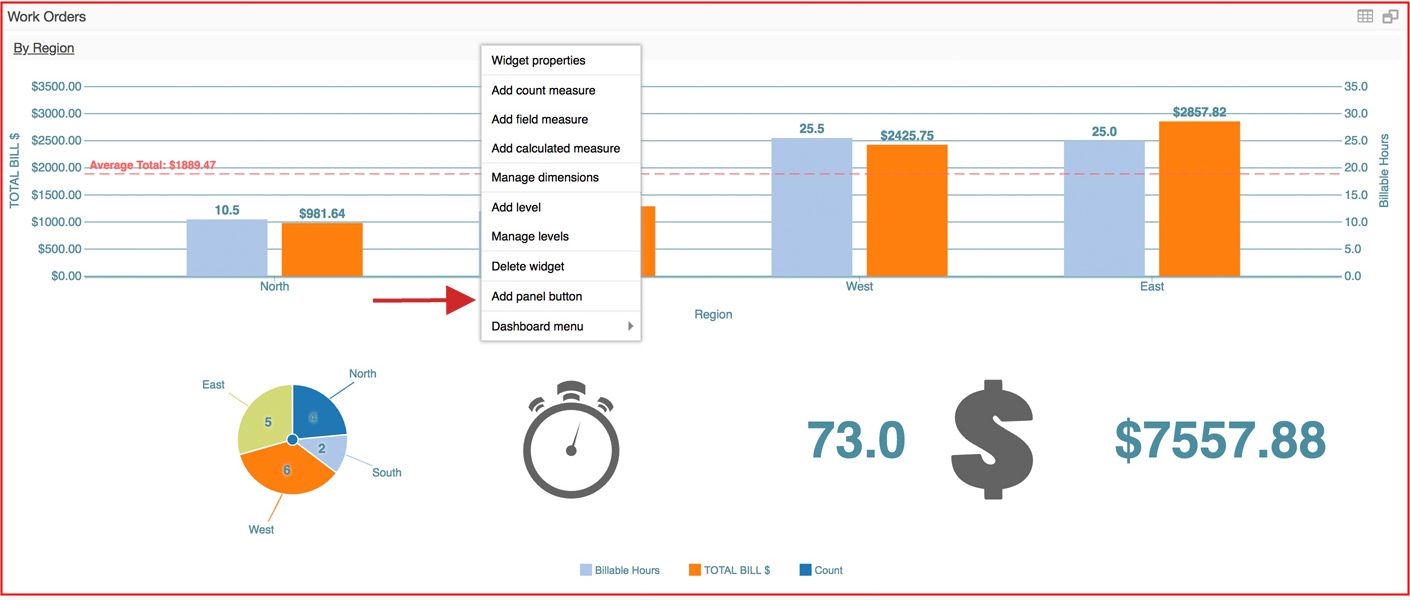
- Right-click near the top of the widget where you would like the button to appear, and select 'Add panel button' from the pop-up menu.
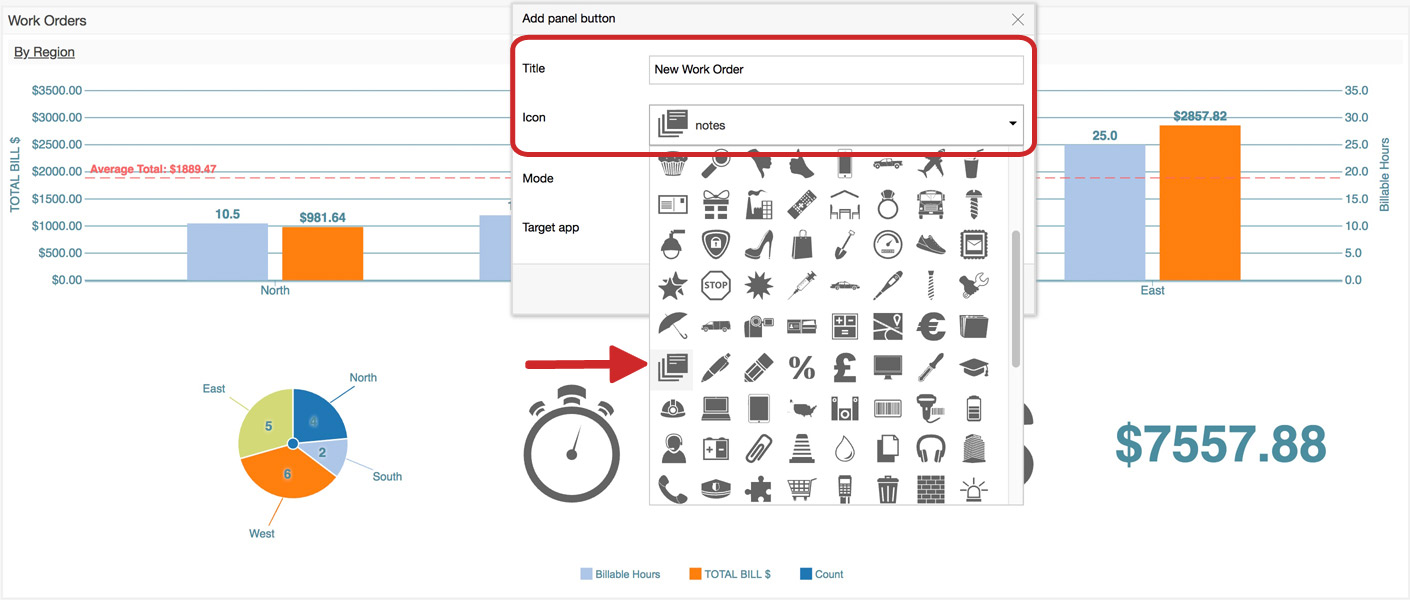
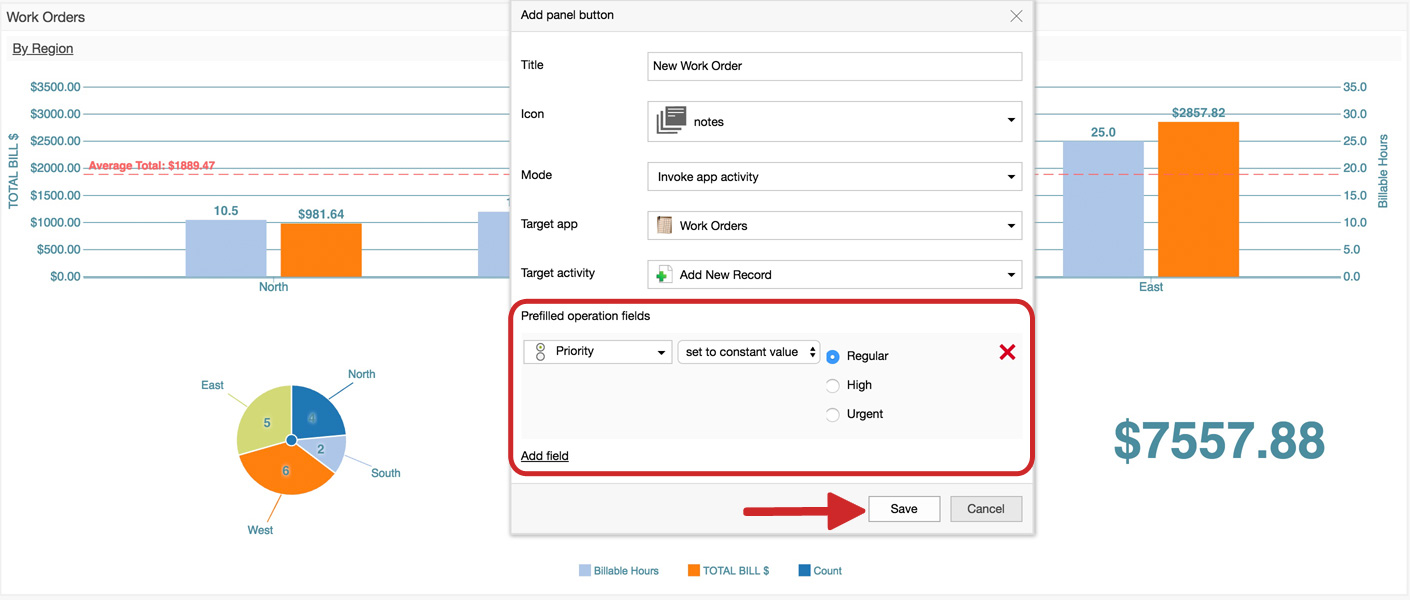
- Add a title to act as a button label (e.g. New Work Order), and select an icon (e.g. notes) for your button.
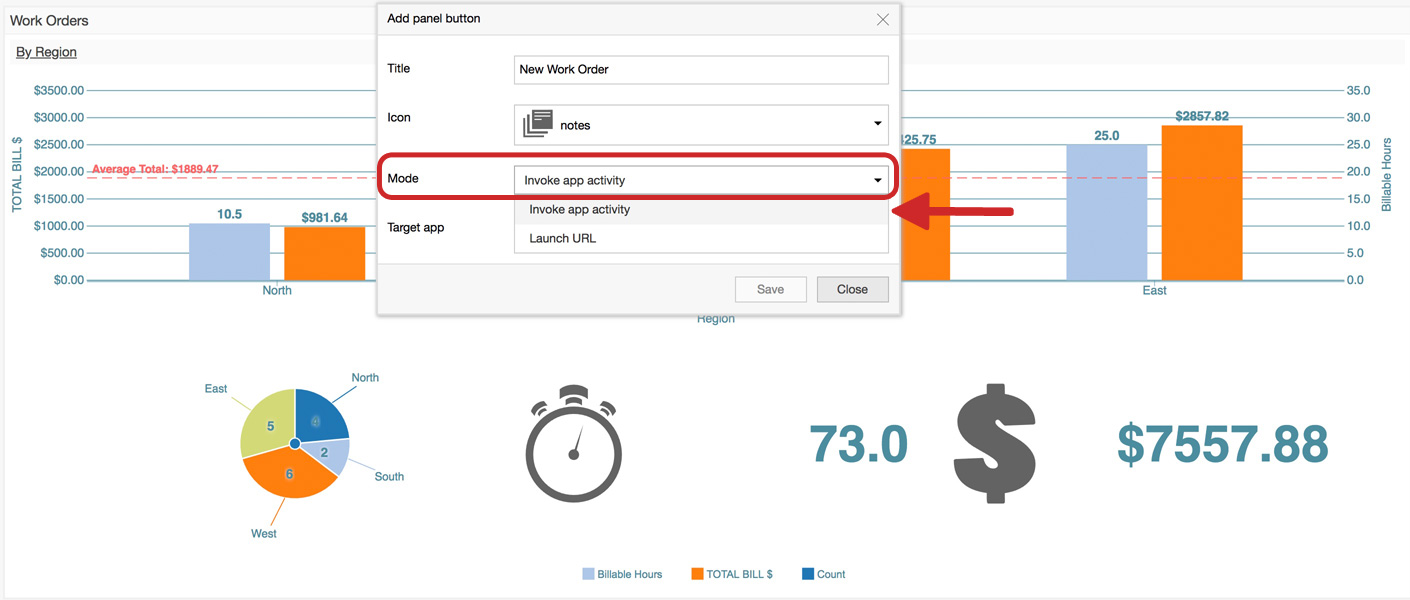
- Select a 'Mode' (e.g. Invoke app activity).
- Select a 'Target app' from the dropdown list (e.g. Work Orders).
Note: You may alternatively select 'Launch URL' in step 5, and enter a target URL in step 6.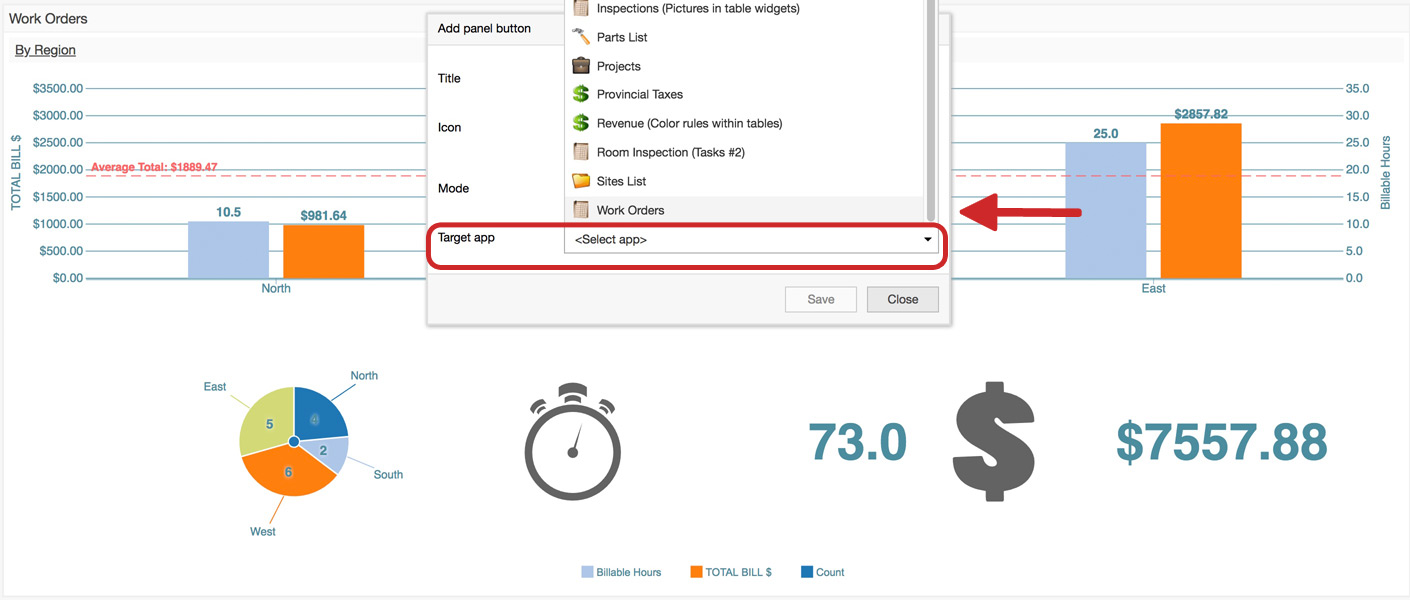
- Select a 'Target activity' from the dropdown list (e.g. Add New Record).
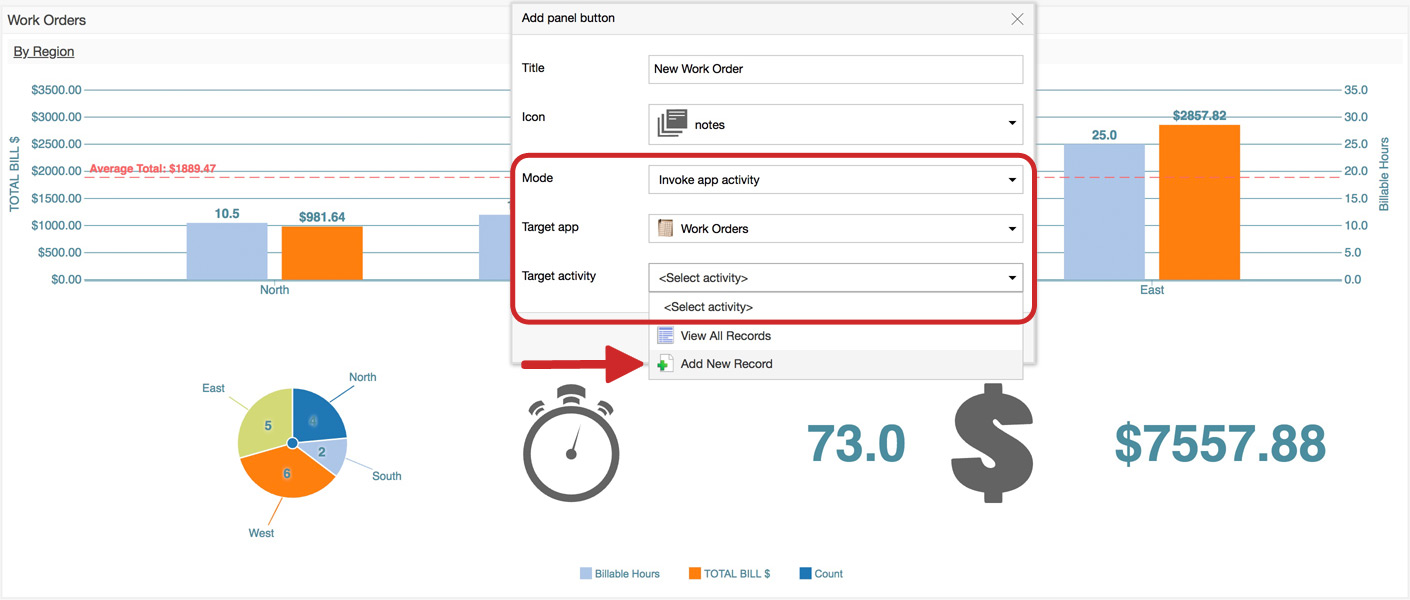
- If you wish, prefill operation fields in your new record (e.g. Priority). Click 'Save.'
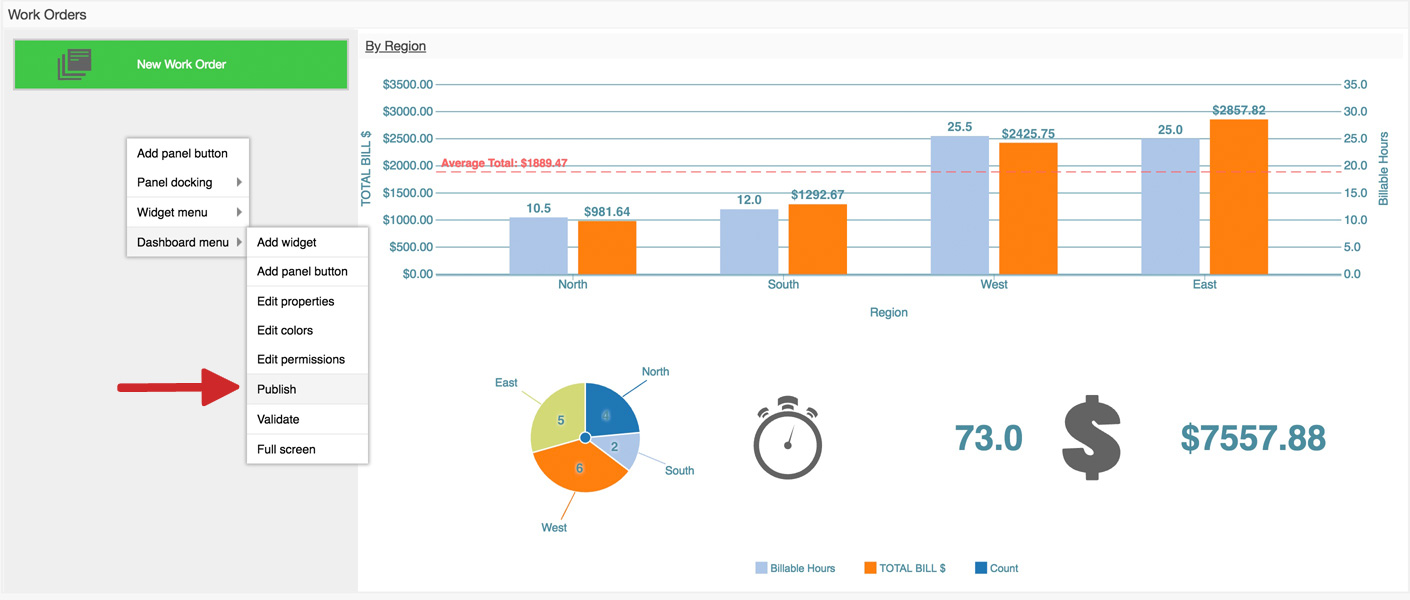
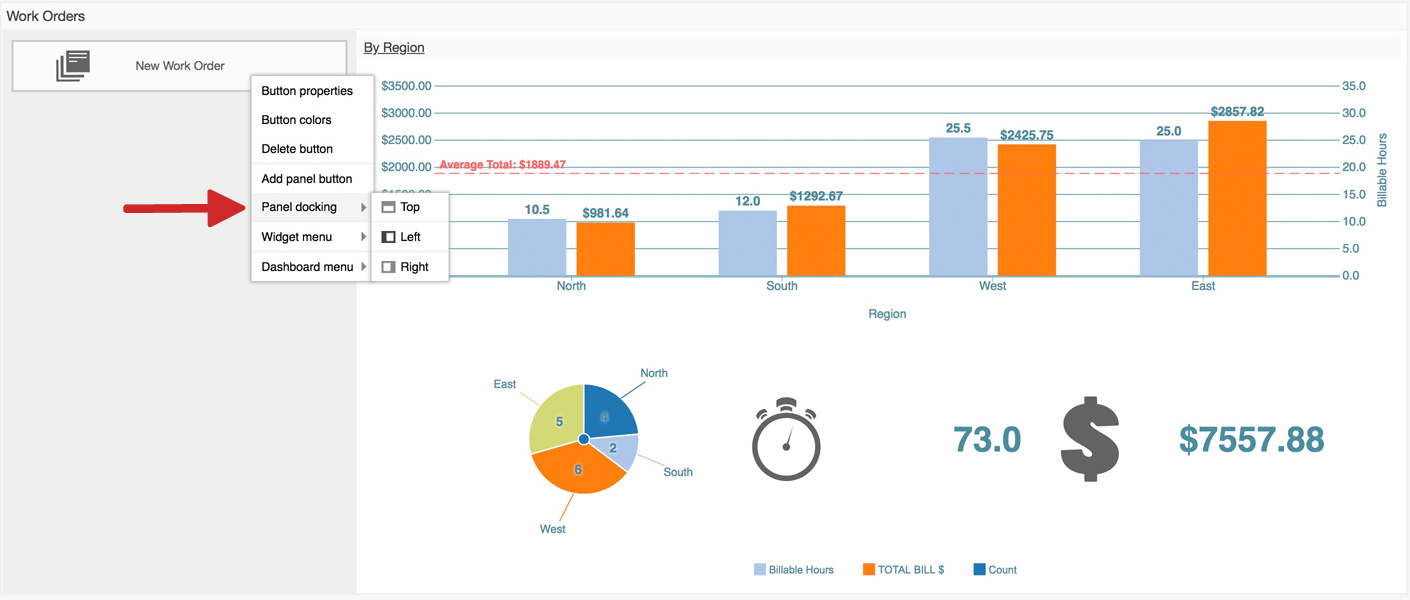
- That's it! The new button now appears in the top-left corner. You may position it in the top-middle or top-right corner, by right-clicking the button and selecting 'Panel docking.'
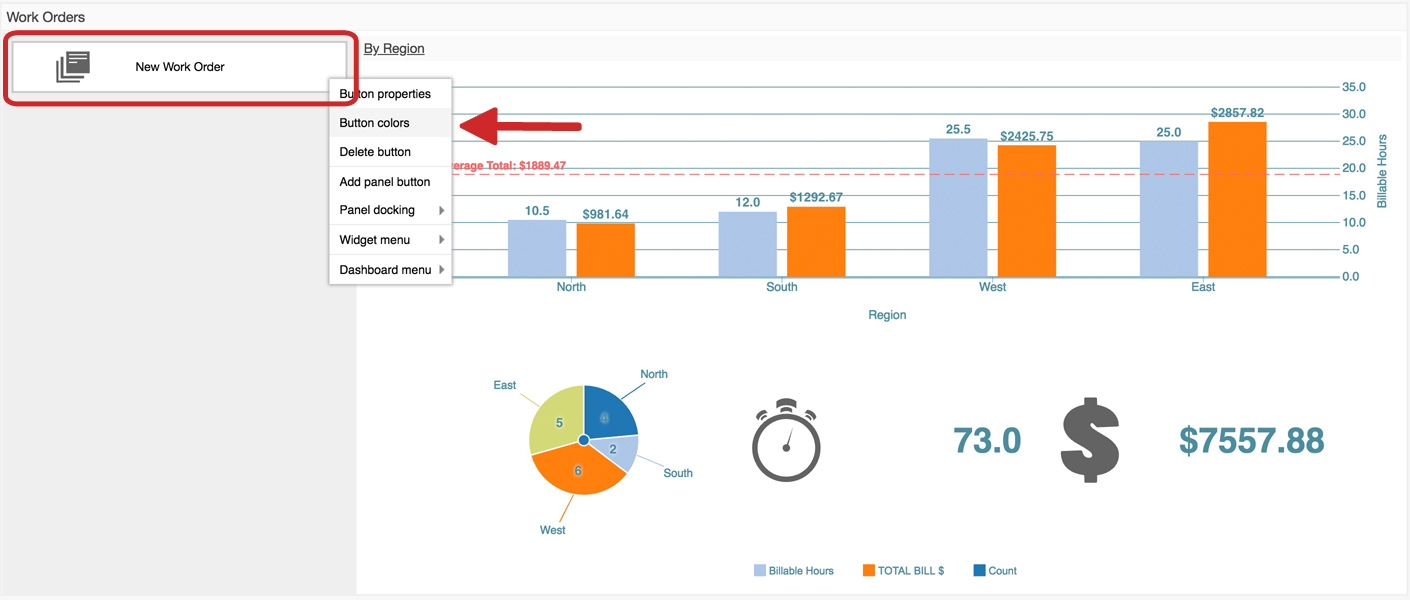
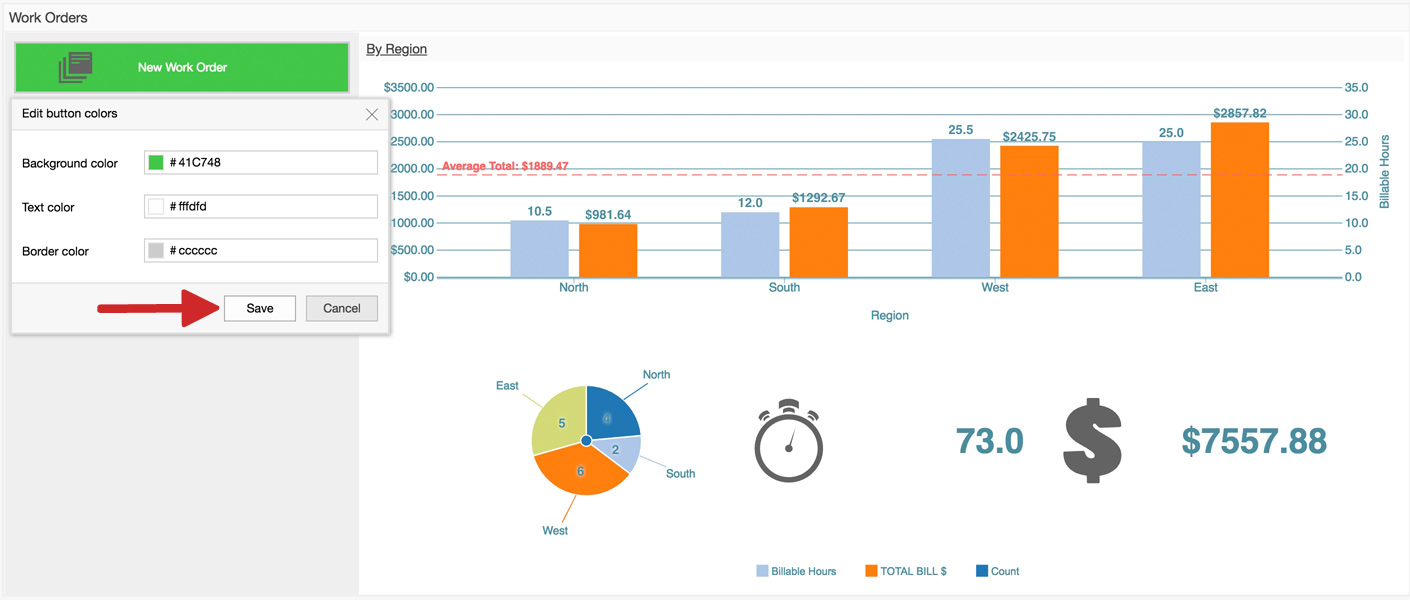
- To customize the color, right-click on the button and select 'Button colors' from the pop-up dropdown list.
- Select the background, text, and border colors by using the picker or entering a web color code. Click 'OK.'
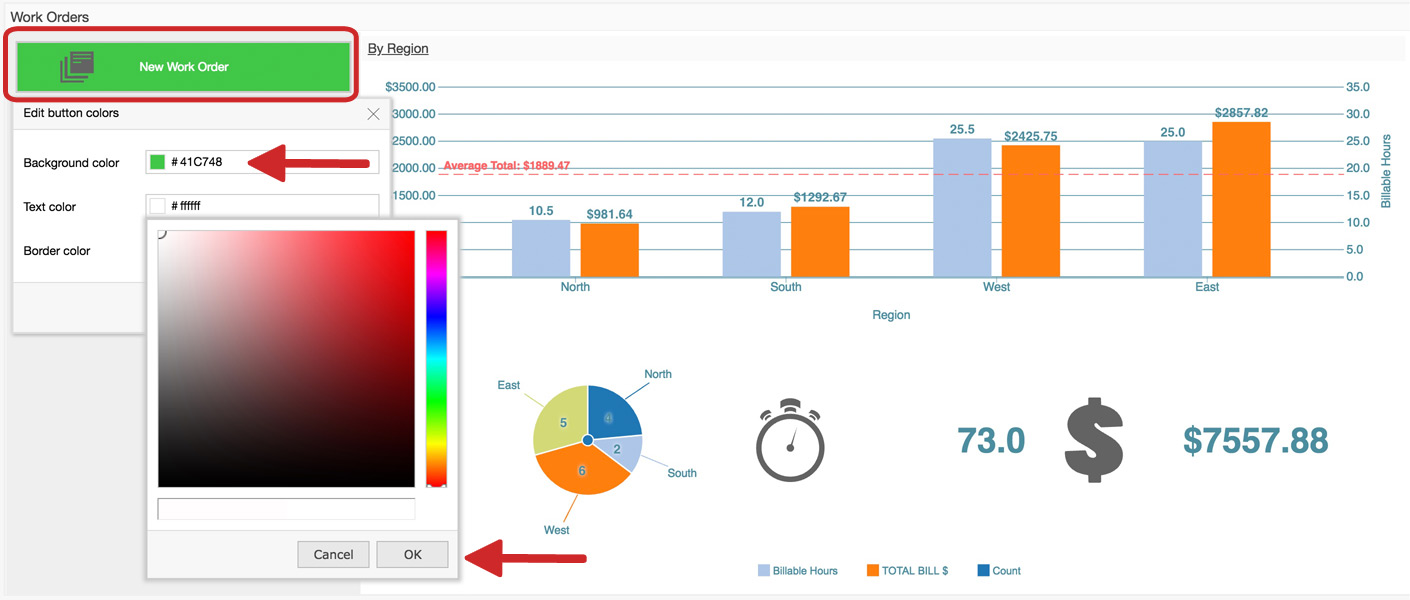
- Save your button.
- Before publishing, you can test out the button and ensure the proper functionality (e.g. opens a window to add a new record to the app) by clicking it.
- Repeat steps 3 - 14 to add as many buttons to the widget as required.
- Once you're satisfied, right-click anywhere, and select 'Publish' from the pop-up dropdown list.
