SLA compliance escalations
Use the escalations feature to create automated processes that execute the instant a conditional statement is 'True.' Escalations are often used in time-based scenarios where a record needs to be modified at a certain time and date or reaches a certain age.
Example
An IT Service Desk has a Service Level Agreement (SLA) to resolve all tickets within 72 hours. If a ticket has still not been resolved within 75% of that time allotment (54 hours) the escalation will trigger a transition operation called 'Escalate Ticket' that moves the record into an escalated state for a manager to resolve ASAP.
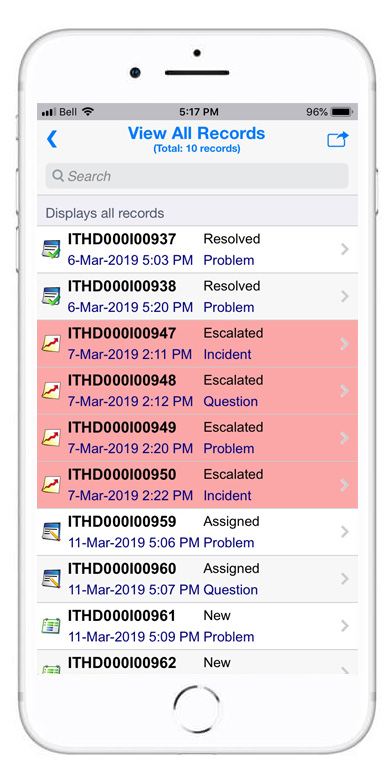
The transition operation has been set to notify the manager via email that the ticket is now high priority and the ‘View all records’ view has been configured to highlight escalated records, so they are brought to immediate attention.

Instructions
- Customize the application that you would like to add an escalation to (e.g. IT Service Desk).
*Note: This App has been preconfigured with a transition operation called 'Escalate Ticket' that sends a notification email when it executes. This escalation works by triggering a transition operation so one must be configured beforehand.
- Go to the Operations section and click the Escalations tab.
- Click the 'Add escalation' button at the bottom of the screen.
Note: Each individual software robot user is limited to a quota of 1,000 automated escalation calls per hour.
Please contact support for details.
- Fill out the General Properties section by providing a title and optional design comment description.
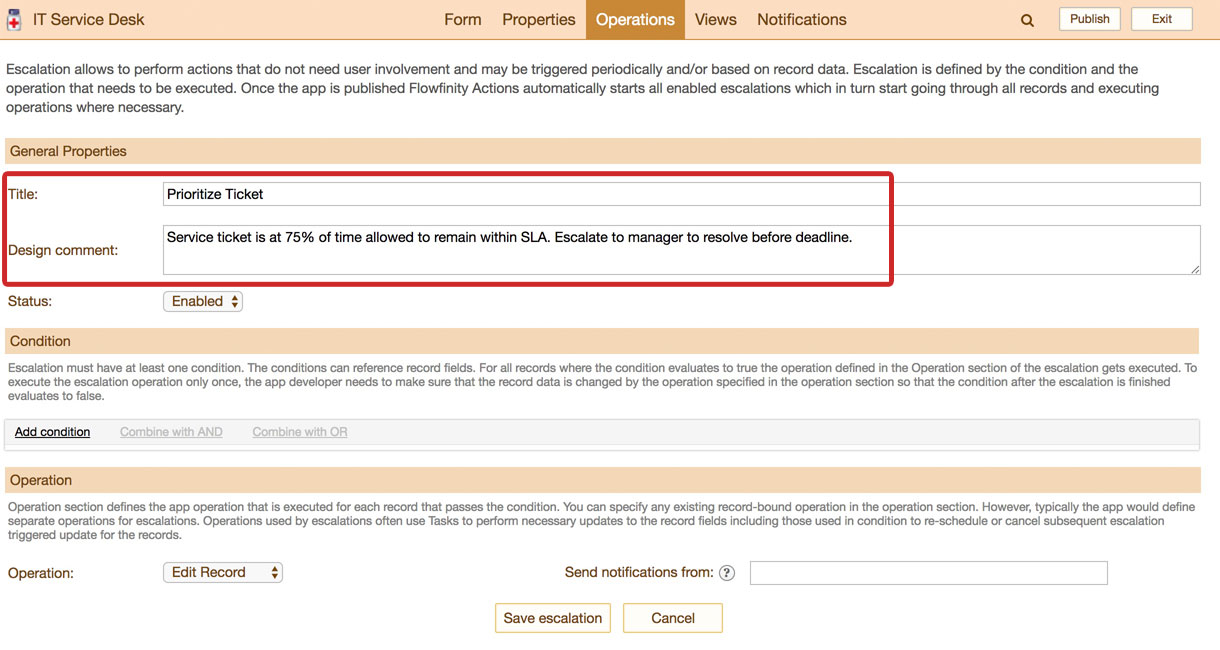
- Ensure that the status of the escalation is set to 'Enabled.'

- Click 'Add condition.' A condition is required to tell the escalation when to execute.

- Select a field from the dropdown list. This provides a value for the escalation to check if returns 'True.'
We select 'Ticket Start Time' to measure the time that has elapsed since the ticket was created.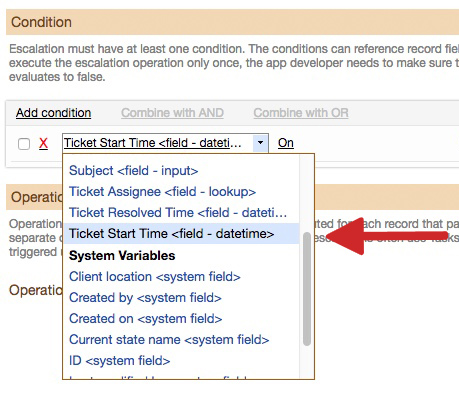
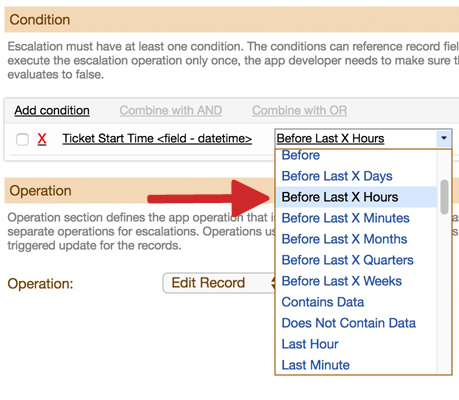
- Select a conditional statement from the dropdown list. This is required to check against the field value chosen in step 7. We want to monitor the time elapsed since the ticket was created in hours so select 'Before Last X Hours.'
This works because the escalation robot is constantly checking back at records and once one was created BEFORE X HOURS ago, the statement is 'True' and the escalation executes.
- Select 'Constant' from the next dropdown. This will already be displayed by default.

- Enter the value the conditional statement should check for. We will enter the value '54' so the escalation will execute once 54 hours have elapsed since the creation of the ticket. As previously described, 54 hours is 75% of the 72-hour SLA time limit.
The escalation should only run on tickets that are in the states 'New' or 'Assigned', and not on tickets that are already 'Resolved' or 'Escalated.' This requires two additional conditions.

- Click 'Add condition.'
- Select 'Current state name', 'Equals', 'Constant', 'New.'

- Repeat steps 11 and 12 to adjust the condition to also execute if the ticket is in the 'Assigned' state in addition to the 'New' state.
- Select the checkboxes beside both 'Current state name' and click 'Combine with OR.'
Success! Your conditions are all set. The escalation will now only execute when the current state of a ticket is equal to either 'New' OR 'Assigned.'


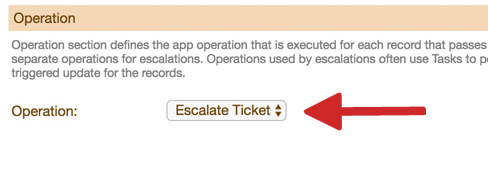
- Select the transition operation that will execute when the conditional statements trigger the escalation (e.g. Escalate Ticket). The operation can also generate an email notification that the state of the record has changed.
- Assign an email address that the escalation will send notifications from. e.g. info@example.com
- Click 'Save escalation' and publish the application.
Now, if a ticket remains unresolved after 54 of the allotted 72 hours has passed, it will automatically be updated to an escalated state and flagged on both desktop and mobile devices.

